How to Connect
Use this guide when you want to connect to your own Project Zomboid server. If the server is already online and reachable, go straight to the join steps. If it is not reachable yet, HaruHost Tunnel is the sure-fire way to make it accessible first.
Location
Section titled “Location”- Game Servers →
Your Game Server Name→How to connect
Part 1: Make sure the server is reachable
Section titled “Part 1: Make sure the server is reachable”If players cannot join yet, solve reachability first.
The easiest path is Tunnel. HaruHost prepares the connection for you so the server can be reachable over the internet without you having to manually set up port forwarding and firewall rules first.
Step 1: Open your server and start the connection guide
Section titled “Step 1: Open your server and start the connection guide”Open your Project Zomboid server page and use How to connect.
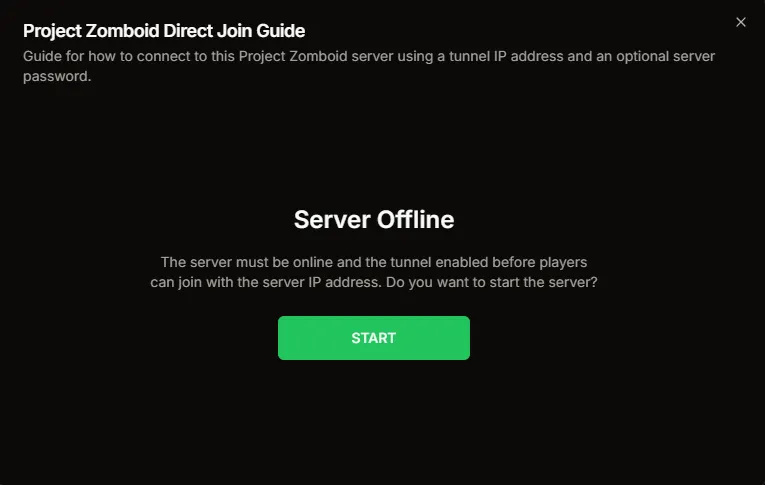
Step 2: Start the server if HaruHost says it is offline
Section titled “Step 2: Start the server if HaruHost says it is offline”If the server is offline, HaruHost shows the start prompt inside the connection guide.
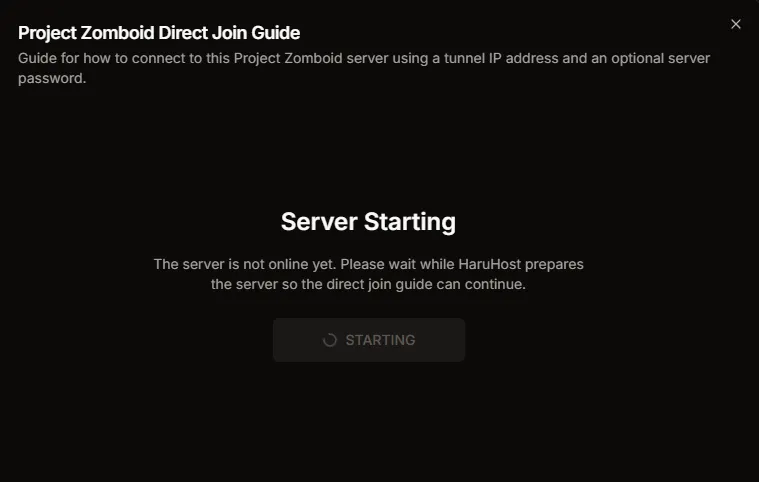
Step 3: Wait for the server to finish starting
Section titled “Step 3: Wait for the server to finish starting”After you press Start, HaruHost keeps the guide open while the server is still booting.
Step 4: Let HaruHost prepare the connection details
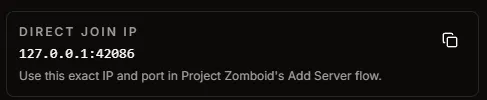
Section titled “Step 4: Let HaruHost prepare the connection details”Once the server is running and the guide is ready, HaruHost shows the exact values to use:
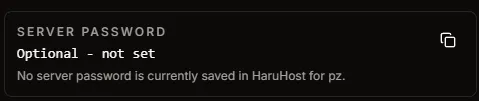
Direct Join IP: the exact IP and port to add in Project ZomboidServer Password: the password to enter in the Add Server form if the server uses one

If the direct join address is not working, treat that as a reachability problem. First check that the server shows Online in HaruHost. If the server was started without Tunnel, enable Tunnel and restart the server.
Part 2: Join the server
Section titled “Part 2: Join the server”Project Zomboid uses a Favorites and Add Server flow. You add the server IP first, then continue through the server account and character setup flow.
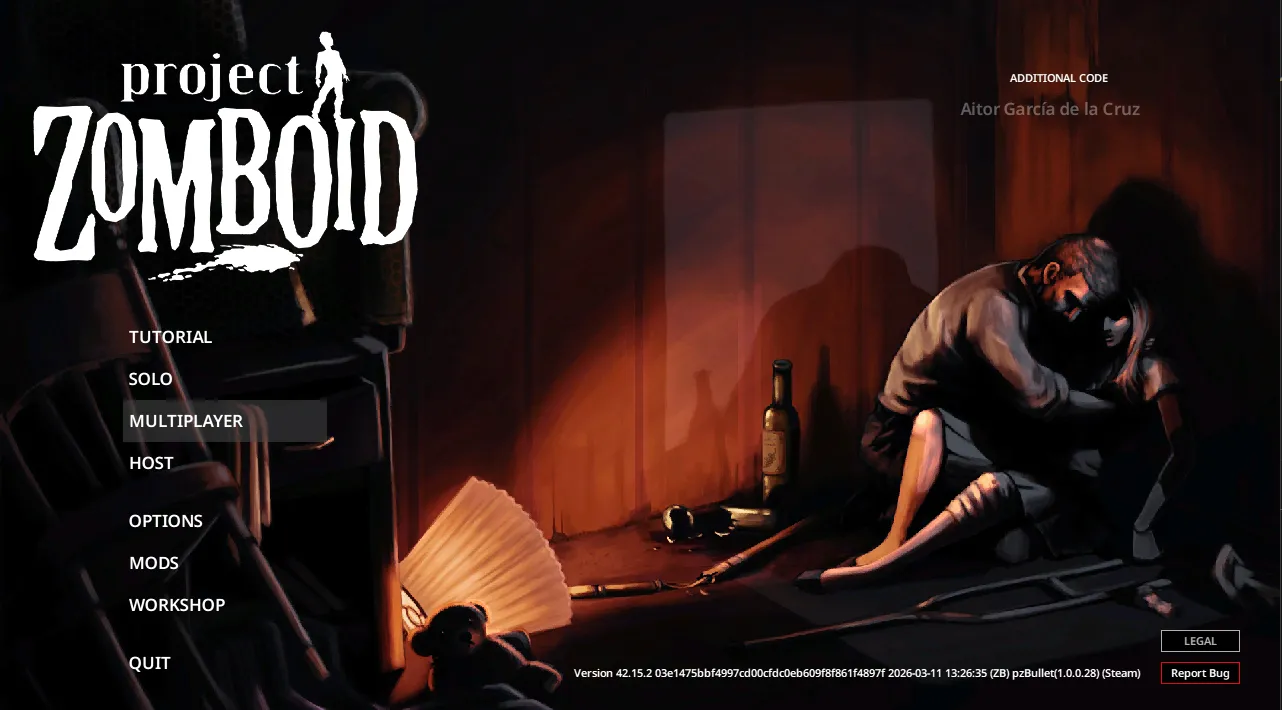
Step 1: Open multiplayer
Section titled “Step 1: Open multiplayer”Launch Project Zomboid and select Multiplayer from the main menu.
Step 2: Open Favorites and add a server
Section titled “Step 2: Open Favorites and add a server”In the server browser, stay on Favorites, then choose Add Server.
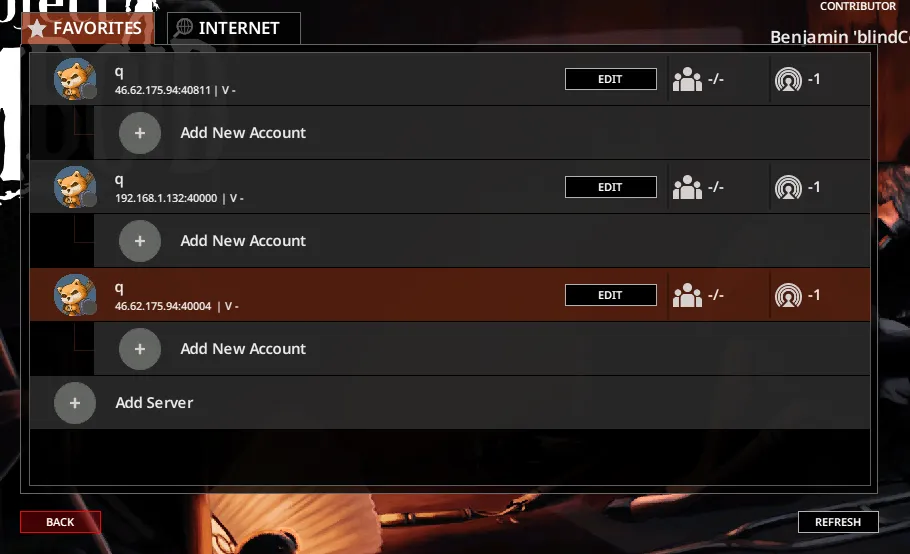
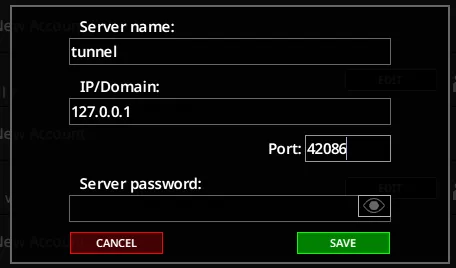
Step 3: Enter the Direct Join IP and optional Server Password
Section titled “Step 3: Enter the Direct Join IP and optional Server Password”Copy the Direct Join IP from HaruHost, paste it into the server entry, and enter the Server Password only if HaruHost shows one for this server.
Step 4: Create your server account and leave Steam Relay unchecked
Section titled “Step 4: Create your server account and leave Steam Relay unchecked”Project Zomboid then asks for a username and password for your server account. If you are joining through Tunnel, leave Use Steam Relay unchecked before saving. This is separate from the optional server password above.

![]()
Step 5: Select the saved account and connect
Section titled “Step 5: Select the saved account and connect”Choose the saved account under the server entry, then press Connect.

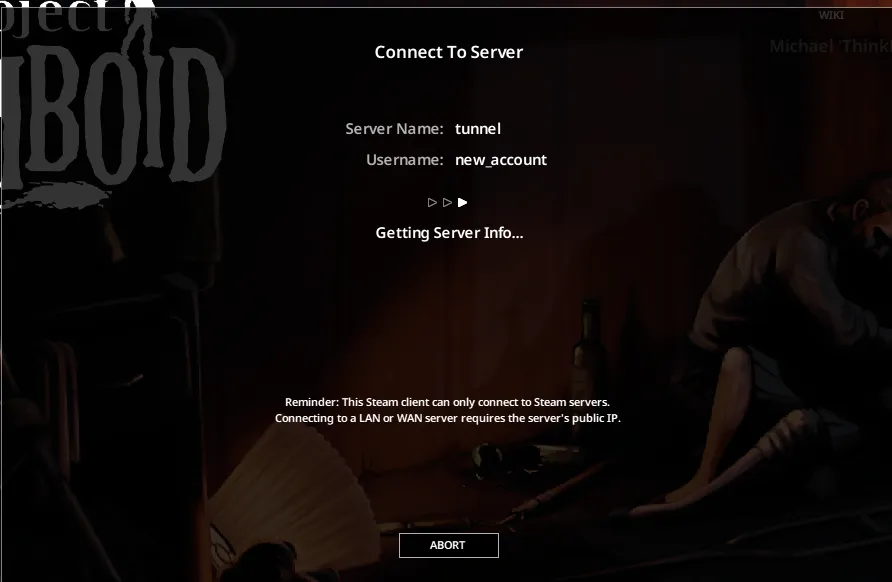
Step 6: Wait for server info
Section titled “Step 6: Wait for server info”Project Zomboid fetches the server information before moving into character setup.
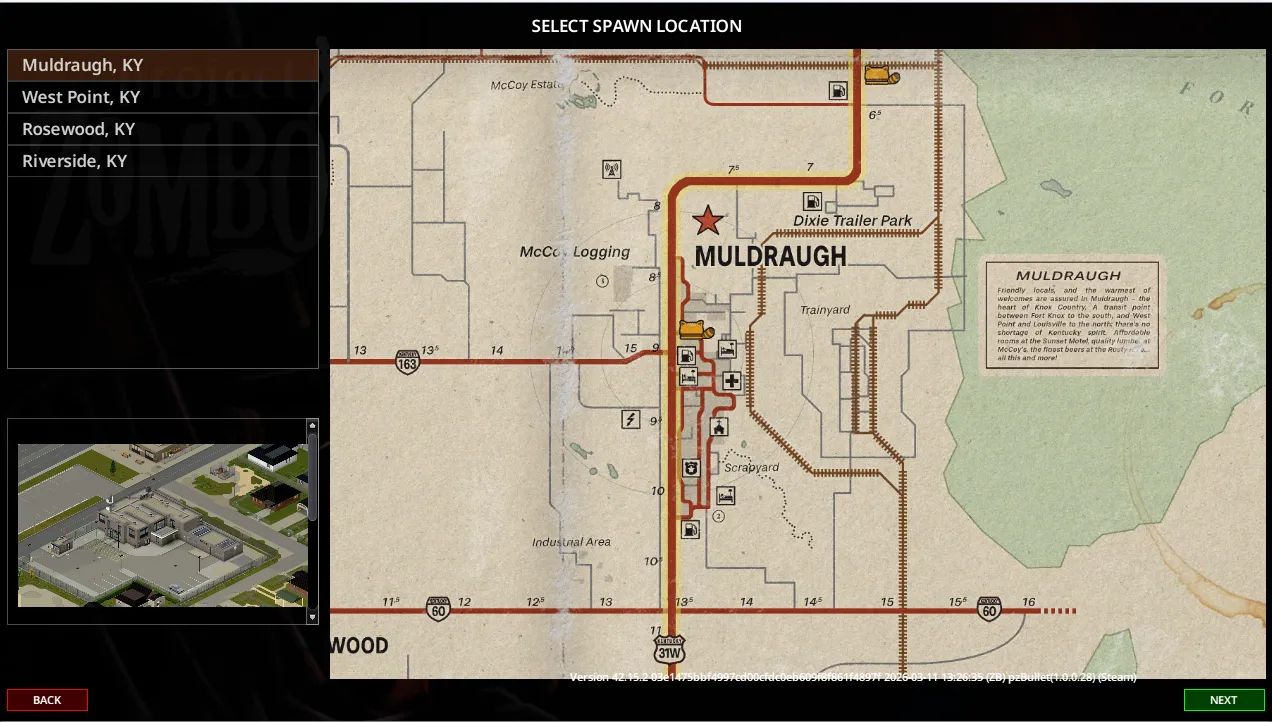
Step 7: Choose a spawn location
Section titled “Step 7: Choose a spawn location”Pick the spawn location you want to use for this character.
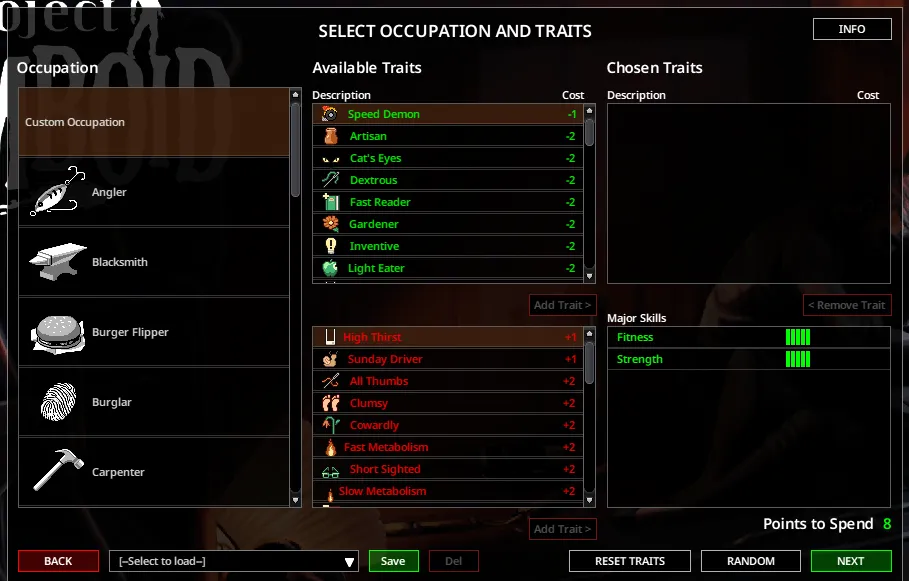
Step 8: Pick occupation and traits
Section titled “Step 8: Pick occupation and traits”Choose your occupation and traits, then continue to the next step.
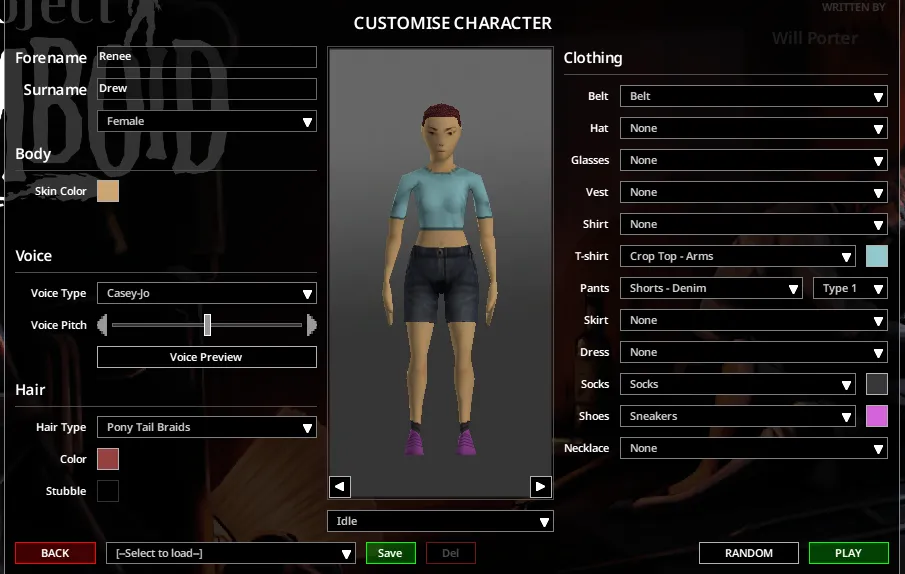
Step 9: Customize the character and press Play
Section titled “Step 9: Customize the character and press Play”Adjust the character appearance and press Play when you are ready.
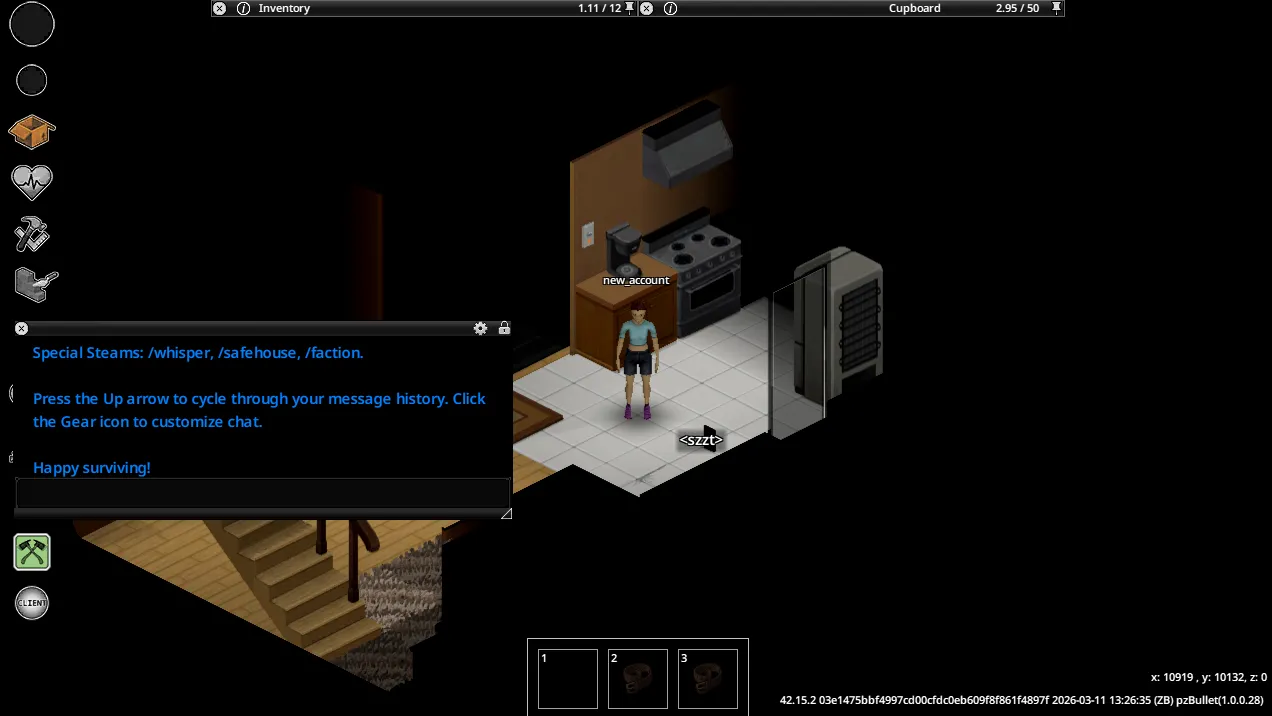
Step 10: Wait for the world to load
Section titled “Step 10: Wait for the world to load”After loading finishes, you should appear in the server world.
Troubleshooting
Section titled “Troubleshooting”The server is not reachable from the internet
Section titled “The server is not reachable from the internet”Use Tunnel as the first fix. That is the main HaruHost advantage here, because it gives you a reliable path without making you manually configure router port forwarding and firewall rules first.
Connect fails or server info does not finish loading
Section titled “Connect fails or server info does not finish loading”- Check that the server status shows
Onlinein HaruHost. - If you enabled the tunnel while the server was already running you will need to restart the server for the tunnel to be properly set up.
- If you are using
Tunnel, leaveUse Steam Relayunchecked in the Project Zomboid account form. - If you use manual setup for firewall and port forwarding, re-check that the rules are correct, stop the server, and run HaruHost port checker to validate that the ports are reachable over the internet.
The password is rejected
Section titled “The password is rejected”- Copy the exact
Server Passwordfrom HaruHost. - Leave the password empty if HaruHost does not show one for that server.
- If the password was changed recently, restart the server before testing again.
The login still fails after the server entry is saved
Section titled “The login still fails after the server entry is saved”- Check whether you are entering the optional server password in the
Add Serverform or the separate server account credentials after that step. - If the server entry saves but login fails, create or re-enter the account username and password for that specific server.
Summary
Section titled “Summary”The flow is simple:
- Make sure the server is reachable.
- If reachability is the problem, use HaruHost
Tunnelfirst. - Add the
Direct Join IPin Project Zomboid. - Enter the
Server Passwordonly if HaruHost shows one. - Leave
Use Steam Relayunchecked when you are joining throughTunnel. - Continue through the server account and character setup flow until the world loads.